


In today's dynamic world, interactive digital signage is becoming increasingly widespread, offering engaging experiences beyond static displays. This blog post will guide you through the process of creating a simple yet powerful interactive digital signage solution using an Arduino Nano controller, a push button, and OptiSigns. We'll cover the essential steps for wiring and coding your sensor, then dive into its diverse real-world applications across various industries.
The Power of Interaction: Why IoT and Digital Signage?
OptiSigns Digital Signage, when combined with the Internet of Things (IoT), transforms ordinary screens into active participants in user engagement, moving them beyond passive display.
IoT sensors can gather real-time data and input from the physical environment, enabling dynamic content changes, personalized experiences, and actionable insights. A simple push button, as we'll demonstrate, can be a powerful trigger for these interactive experiences.
Transforming Industries with Interactive Signage
Interactive digital signage, powered by simple IoT sensors like a push button, can revolutionize various industries.
Enhanced Product Information and Promotion Examples
In a retail environment, a push button IoT sensor can transform static product displays into interactive experiences.
For example: at checkout, you can deploy a button to call for the next customer to a specific counter, speeding up the checkout process.
Another example: imagine a customer browsing a new line of smart home devices. A digital sign above the display could show general information. However, by pressing a button next to a specific product, the customer could trigger the digital sign to display detailed specifications, customer reviews, or even a promotional video for that particular item.
This allows customers to delve deeper into products of interest, enhancing their shopping experience and potentially increasing engagement and sales.
Last example: a button next to a new coffee machine could trigger a video demonstrating its features and brewing capabilities, or display a QR code for a special discount.
There's really no limit to what's possible with an interactive sensor paired with digital signage.
Wiring Your Push Button Sensor
Connecting a push button to your controller is a straightforward process. The key is to understand how to read the button's state (pressed or not pressed) using the Arduino's digital input pins.
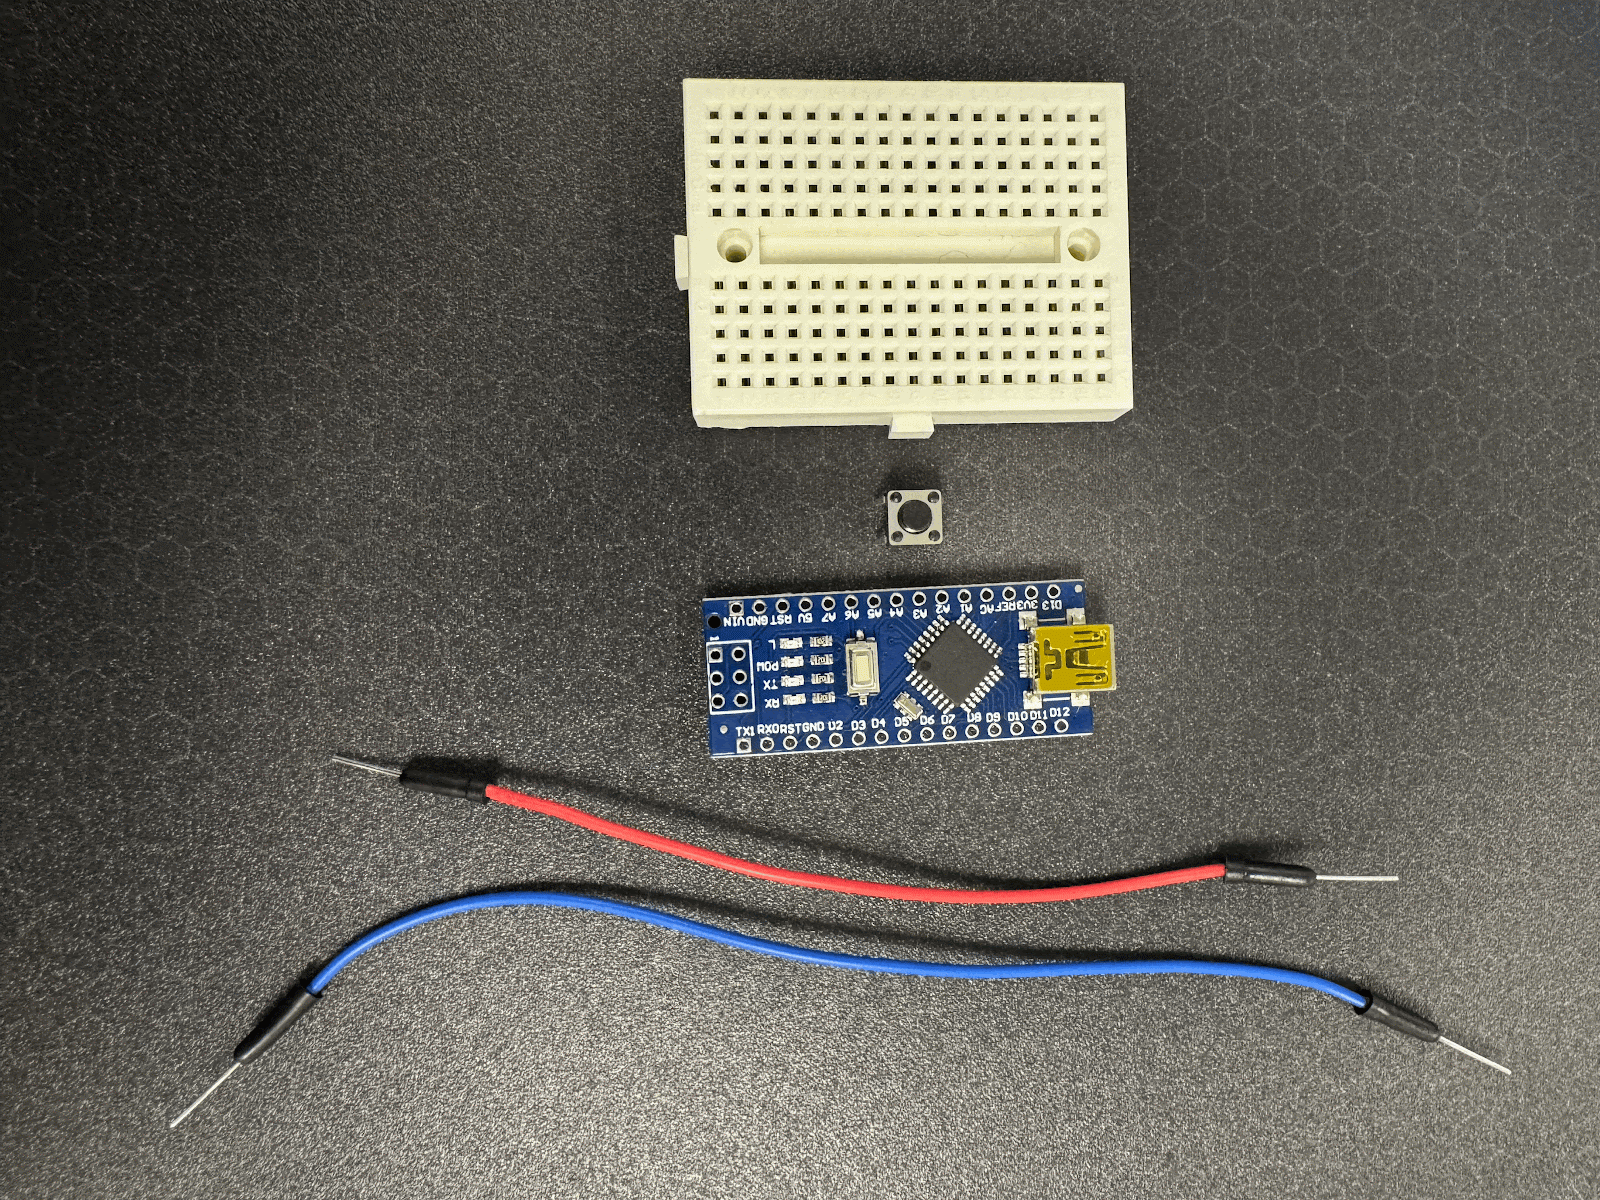
Components Needed:
- Arduino Nano board (Or your preferred board)
- Push button (switch)
- Breadboard (for easy prototyping)
- Jumper wires
Wiring Diagram
In this example, we'll be using an Arduino Nano. Other boards can be used as well, but we've tested this and made sure it works.
To wire a push button to your Arduino Nano, you will typically connect one leg of the button to a digital input pin on the Arduino, and the other leg to ground (GND). When the button is pressed, it connects the digital input pin directly to the (GND) causing the pin to read a LOW state.
We simplified the wiring by using the Arduino's internal pull-up resistors. This eliminates the need for an external resistor.
Wiring Steps:
- Connect one terminal of the push button to a digital input pin on the Arduino Nano (e.g., D2).
- Connect the other terminal of the push button to the (GND) pin on the Arduino Nano.
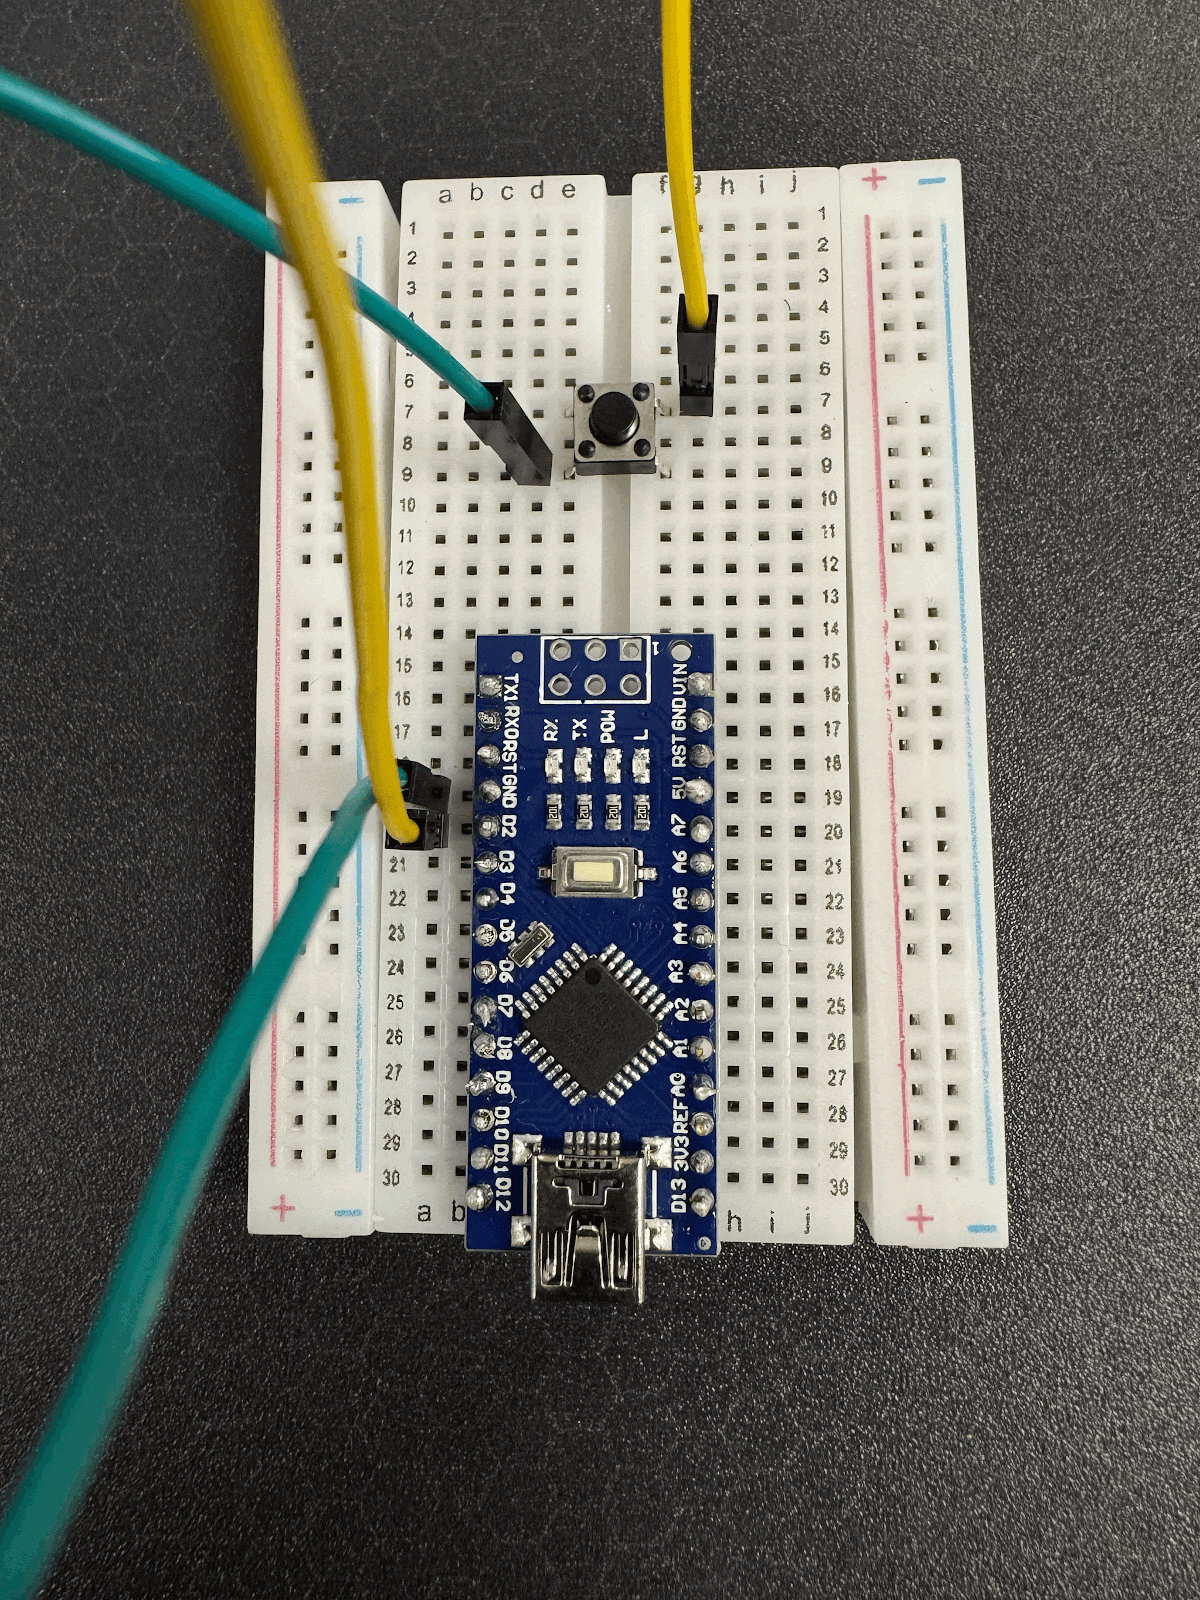
Note: For simplicity and to reduce external components, it is recommended to use the Arduino's internal pull-up resistors. In this configuration, one side of the button is connected to the digital pin, and the other side is connected to GND. When the button is pressed, the pin reads LOW; otherwise, it reads HIGH.
Coding Your Push Button Sensor
Once wired, the Arduino Nano needs to be programmed to interpret the button's input and send a signal to OptiSigns. This involves reading the digital pin connected to the button and then sending a serial command to the OptiSigns platform when the button is pressed.

Arduino Code
The Arduino code will primarily involve setting up the digital pin as an input, reading its state, and then performing an action when the button is pressed. For integration with OptiSigns, this action would typically involve sending a serial command.
OptiSigns Integration
To integrate with OptiSigns, configure an Lift & Learn Engage app and set up “External Communications (RS232)” the Arduino Nano would typically send a signal (e.g., a simple character or string) over its serial port to a connected device.
OptiSigns provides an IoT Sensor Add-on that works with serial communication, allowing you to trigger content changes on your digital signage screens based on sensor input.
Ready to transform your customer's experience? Start creating amazing interactive experiences today! Reach out to our team for support! With IoT sensors, the possibilities are endless.
Download the app today and see how easy it is to get started!
For more information on set up, check out our Youtube Video.


